Valentine’s Day Special–Hand Holding with your Camera

Okay, so this post isn’t about holding hands with your camera. However, it is about how to properly hold your camera in your hands in order to get nice sharp photos.
Properly hand-holding your camera is all about providing a stable base for your camera to minimize any movement while the shutter is open. Movement by the camera while the shutter is open results in a blurry photo: the more movement, the more blur. A stable camera can help produce images with details that are razor sharp. Especially at slower shutter speeds or longer focal lengths, minimizing camera shake becomes even more critical in ensuring that your images are sharp. A tripod makes an excellent stable support for this purpose, but it’s not always convenient or practical to carry with you, so I’ll discuss some of the finer points on good hand-holding technique.
Getting great photos all starts with stability. Unfortunately, the human body isn’t all that stable to begin with. When holding the camera to compose a photo, we have to hold it up to our eyes. Doing this, we have muscles that are tensing, chests that are moving in and out with each breath, and our legs working to keep our upper bodies in balance so we don’t fall over. All of this excess movement that doesn’t particularly help in our photography. There are things we can do to counteract these movements in order to get sharp images.
It’s important to make sure your hands are providing a solid platform for the camera to rest on. Many cameras provide a grip for our right hands to firmly hold onto, with controls placed above for access with your thumb and index finger.
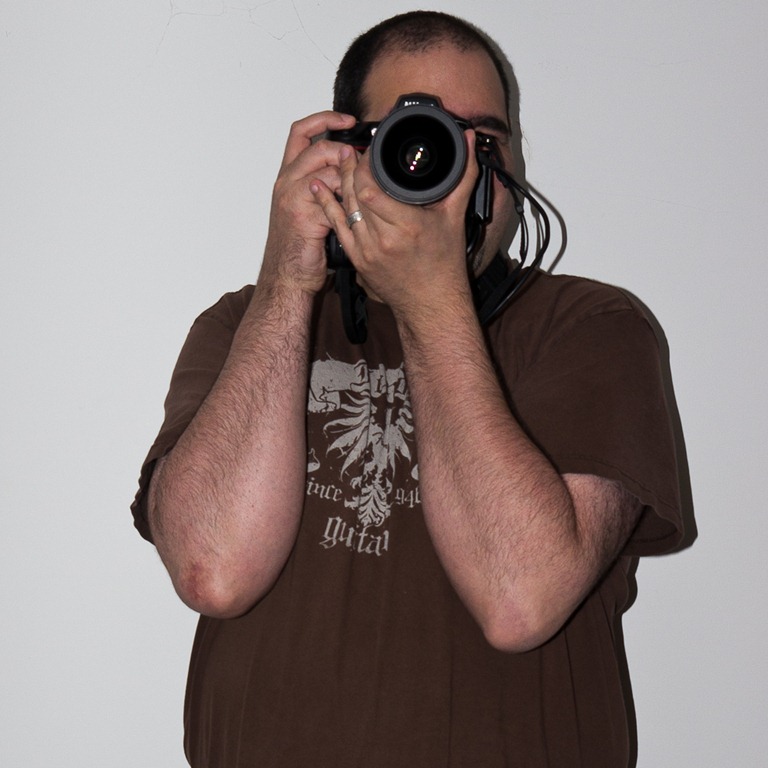
With your right hand firmly holding the grip, place your left hand under your lens, with the heel and palm of your hand resting against the bottom of the camera, and your fingers underneath the bottom of the lens. This also lets you get easy, but stable, access to the focus and/or zoom rings on the lens.
Based on my experience of watching novice photographers, arm positioning is the Achilles' heel of proper technique. I’ll often see arms out to the sides or, worse, flailing around as they try to get the camera to stop moving. To give your hands a solid base on which to stand, your arms should be bent sharply with your elbows pointing straight down and pulled into your body. It feels very unnatural to hold your arms this way at first, but you’ll immediately feel how stable it is, and you’ll see much less shakiness in your viewfinder.
Your feet need to be in a good position to support your legs. Standing flat-footed with your feet square to the subject is not a great standing position. Starting with you staring directly at your subject, turn your body so your left shoulder is about 1/3 of the way towards your subject. Your left leg should be about a half-step in front of your right leg, with your left foot pointing directly at your subject. Turn your right foot away from your subject until you feel comfortable and stable.
Finally… posture, posture, posture! Keep your back straight and stand tall. Don’t hunch over, which will not only kill the stability of your grip and stance, but will also introduce fatigue into your back and muscles, which will make holding your body in a proper position throughout a long shoot more and more difficult as the day progresses.
Once your camera is in position, you will find that it doesn’t quite reach your eye. This is a by-product of how we were made, as our arms, when folded in half, just aren’t that long. Lower your neck slightly (without bending your back), and you should have a perfect view through the viewfinder with a nice stable camera in your hands.
Here are some photos to try to explain, visually, the technique I use.
 |
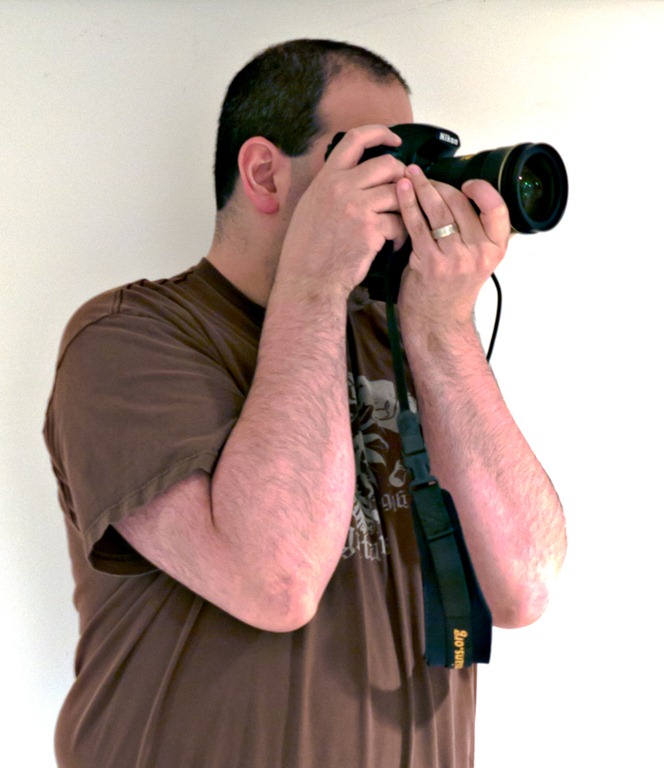 |
Flickr user al-ICE g caught me during a Flickr meetup demonstrating this technique.

Now that you’ve got your hands, arms, and legs in the right place, the last thing you want to do is ruin it with sudden movements. Don’t hold your breath, because that will actually cause your body to strain to hold that breath in, when it naturally wants to let it out. Instead, breathe normally. When you’re ready to take the shot, exhale half of the breath, pause briefly, and gently squeeze the shutter release. Don’t press it with a sudden motion… that will invariably cause the entire camera to move, defeating the entire exercise.
There are other things you can do to help augment proper hand-holding, such as leaning against a stationary object, such as a wall or lamp post. But it all starts with good technique as it’s foundation.
Shooting handheld in low-light is a tough test of good technique. With practice, however, you’ll be able to get sharp photos. For example, I was able to capture this image, taken at night, by using a solid handheld grip, and bracing myself against a streetlight post.

Even in situations where you have the added benefit of an image stabilized lens, which helps to mechanically counter camera shake, good hand-held technique is still very important. When you want to intentionally leave the shutter open for a longer exposure to convey motion, like cars or other moving objects moving through the frame, nothing kills this type of shot like wavy light trails.
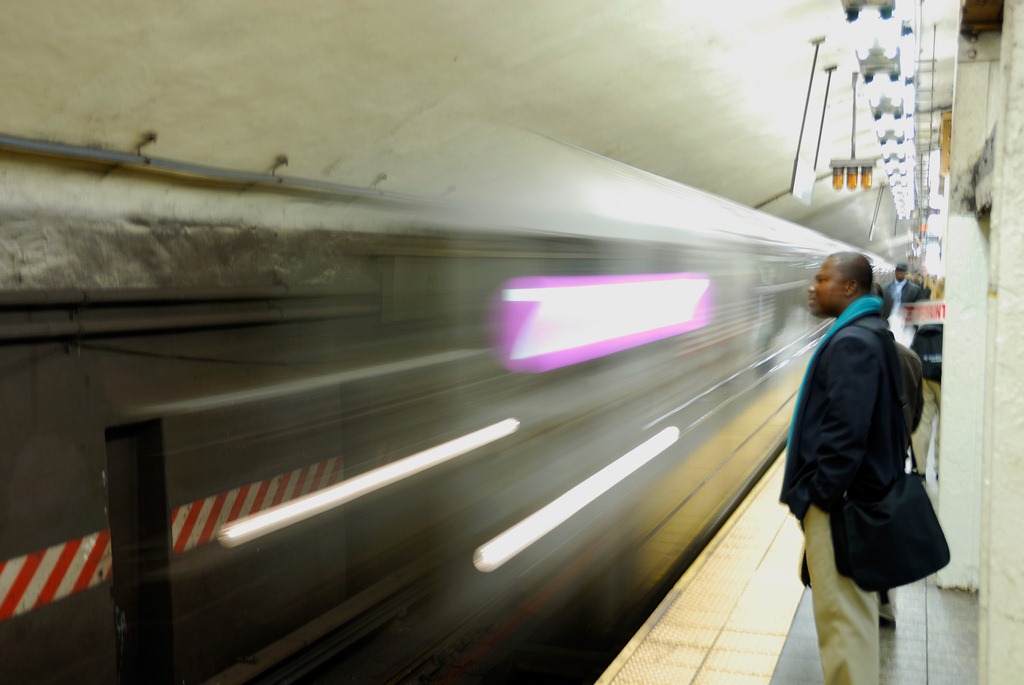
Alternatively, professional photographer and author, Joe McNally has posted a video that discusses a slightly different, more awkward, but very effective handholding technique.
And finally, for a laugh, here’s a link to 15 examples of what not to do.